MainPage:Nuclear:Summer2017:Blessed
Commissioning of a crystal drawing system
Abstract
Text.
Introduction
Lead Tungsten crystals have been found to be very effective in particle energy measurements and thus, the continuous developments in nuclear physics. This is because the crystals have have favorable properties such as:
1.Relatively high light yield:
2.Small Moliere radius:
This is a constant/property of a material which gives the scale of the transverse dimension of the fully contained electromagnetic showers(initiated when a high-energy electron, positron or photon enters a material resulting in either the photoelectric effect, Compton scattering or pair production. All this depends on the energy of the primary particle.) It can simply be defined as the radius of a cylinder containing an average of 90% of the shower's energy deposition.
3.Short radiation length:
This is the mean distance that a high-energy particle travels before losing 1/e of its energy by bremsstrahlung. One would expect that this distance be dependent on the energy of the particle but it only depends on the mass number and atomic number of the material.
However, manufacturing of Lead-Tungsten crystals has yet to be perfected and there has been considerate variation in the properties of the produced crystals. In this project, we aim to build a prototype for the manufacturing of these crystals locally by the Czochralski method. In building this prototype, the behaviour of the mechanical set-up is critical due to the sensitivity introduced by the above method. During the process of making the crystals, the rod needs to be rotated at 35rpm in order to maintain a sufficient mixture of the melt. So that it doesn't fall back into crucible? This rotation introduces some vibrations into the system, along the vibration of the surface the set-up is on or the building in general.
Description of the crystal drawing apparatus
Text.
Calibration of the accelerometer
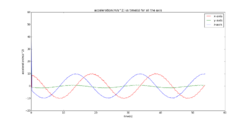
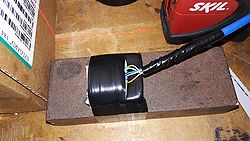
In order to perform vibration studies, we need to calibrate the equipment that will be used to measure any vibration of the apparatus caused by the rotation. Here, we will use an accelerometer. The accelerometer measures proper acceleration and can be calibrated using known values of the gravitational acceleration on the surface of the earth. The hardware for this includes an Adruino board and an ADXL3xx accelerometer.
Vibration Studies
Text.
calibration of the accelerometer:
misalignment angle measured gravity deviation percentage
2.26245953203 degrees, 9.80764530293 m/s^2, 0.0816326530612 % for the x-axis
2.11138229046 degrees, 9.80665779414 m/s^2, 0.0714285714286 % for the y-axis
1.88511051001 degrees, 9.80530664911 m/s^2, 0.0510204081633 % for the z-axis

Rotation Studies
Text.
Calibration of the load cell
Text.
