MainPage:Nuclear:Summer2017:Blessed
Commissioning of a crystal drawing system
Abstract
Text.
Introduction
Text.
Description of the crystal drawing apparatus
Text.
Calibration of the accelerometer
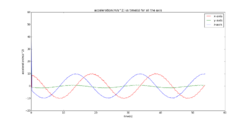
In order to perform vibration studies, we need to calibrate the equipment that will be used to measure any vibration caused by the rotation, in this case, an accelerometer. The accelerometer measures proper acceleration and can be calibrated using known values of the gravitational acceleration on the surface of the earth.
Vibration Studies
Text.
calibration of the accelerometer:
misalignment angle measured gravity deviation percentage
2.26245953203 degrees, 9.80764530293 m/s^2, 0.0816326530612 % for the x-axis
2.11138229046 degrees, 9.80665779414 m/s^2, 0.0714285714286 % for the y-axis
1.88511051001 degrees, 9.80530664911 m/s^2, 0.0510204081633 % for the z-axis

Rotation Studies
Text.
Calibration of the load cell
Text.
